Recently I created a tutorial named How to write a simple jQuery plugin. It is necessary to go through that tutorial if you have no idea how to create a simple jQuery plugin. This tutorial will teach you how to create user-friendly-options for the plugin user - Like you have probably seen and used many times before.
Why are options necessary?
These options turn a script into a jQuery plugin. It changes the script from being static to dynamic. It can save you time in a few ways:
- It makes the script dynamic.
- It saves you the time of sifting through the code.
- It saves you the time of re-scripting the jQuery.
- You don't have to worry about messing up the working plugin.
Let's get started.
What are we planning on doing?
I think we should do something similar to the 'How to create a simple jQuery plugin' tutorial, since the most simple examples often gives us the "AHA!" moment.
This plugin is going to be called "redBorder" and it will be create a 3px, solid red border around the targeted element by default. The options we are going to have is to change the values of the property, and to change the property itself as well!
The jQuery Javscript
(function($) {
    $.fn.extend({
        // Plugin Name
        redBorder: function(options) {
            // Defaults options are set here
            // Every default goes within the { } brackets as seen below
            // A comma separates the different values
            var defaults = {
                property: "border",
                value: "3px solid red",
            };
            var options = $.extend(defaults, options);

            return this.each(function() {
                // Add 'options.' before the value
                // This is done to inform jQuery it is part of the default options
                jQuery(this).css(options.property, options.value);
            });
        },
    });
})(jQuery);
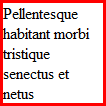
If we target a paragraph element like this:
$("p").redBorder();It will come out looking like it did in the other plugin example.

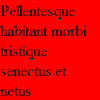
However, if we add the following options (The properties and values options have to be valid CSS properties and values)
$("p").redBorder({ property: "background", value: "red" });It will produce the following results:

Conclusion
And that is it! You now know all you need to know in order to create a jQuery plugin with user options. I had an "AHA!" moment when I figured out how to add options. It seems to open up a whole new world.